Russell Croman is well-known in the astrophotography world, not just for being an amazing astrophotographer, but for releasing incredible tools that are genuine game changers when processing your astrophotography images. His latest tool, Blur XTerminator, is no exception to this rule. What Russell has created is a tool that will transform your astro images and bring them into much sharper focus than ever before!
Trust me, you’re going to want to download this. You can download Blur XTerminator from the RC Astro website.
System Requirements
System requirements from the RC Astro website are as follows:
BlurXTerminator requires a computer with a modern CPU having instructions required to run neural networks. Older CPUs lacking FMA, AVX, and SSE instructions are not supported. Request a trial before purchasing to make sure it will work on your machine.
- MacOS
- Version 10.15 (Catalina) or later
- PixInsight 1.8.8-9 or later
- GPU/Neural Engine recommended for fast performance, but not required. Not all GPUs are supported.
- Apple silicon neural engines (e.g., M1, M2) supported natively
- Windows
- Windows version 10 or later
- Modern CPU capable of running neural networks (AVX, SSE instruction set extensions)
- PixInsight 1.8.8-9 or later
- Linux
- Ubuntu 18.04 or later, or equivalent (glibc 2.27 or later required)
- PixInsight 1.8.8-9 or later
How it works
Blur XTerminator is a deconvolution tool that uses AI to sharpen your astrophotography images. Unike other AI tools that exist in post-processing software, Blur XTerminator is designed specifically for astrophotography images. This means that while other AI tools often struggle with details such as stars, Blur XTerminator has been designed with them in mind, making it the perfect tool to add to your astrophotography image processing workflow.
It is designed to recover detail that is actually in the image, and therefore not adding false data, which can often be the case with AI sharpening. What it can’t do however, is substitute good data – no tool is that good! Results from tools like Blur XTerminator will always work best when it’s working with good data. If you put poor data in, don’t expect to suddenly have an APOD winning image after running Blur XTerminator.
What it WILL do however is correct specific errors that can appear within astrophotography images such as guiding errors, chromatic abberation and more.
How to Install Blur XTerminator
First, you will need to download Blur XTerminator. I recommend starting with a free trial before you commit to spending any money. At the time of writing, Blur XTerminator costs $99.95 – and trust me, it’s worth it, but why not see the results first hand before spending any money.
- To download a free trial, simply follow this link, type in your email at the bottom and you will receive instructions from RC Astro for how to install it. At the time of writing, RC Astro is only available as a plugin for PixInsight. For completeness, I’ve also included installation instructions below.
- Once downloaded, go to PixInsight -> Resources -> Updates -> Manage Repositories.
- Click Add and paste this URL into the box https://www.rc-astro.com/BlurXTerminator/PixInsight/ then select OK twice.
- Go to Resources -> Updates -> Check for Updates. This will install Blur XTerminator.
- Restart PixInsight, and select Yes to apply the update.
- Open Blur XTerminator. You can find it under Processes -> Deconvolution -> Blur XTerminator.
- Once opened, click on the spanner and input your email address that you used to sign up, plus the license key that was emailed to you.
- Click on the Select AI button and select the latest AI file. At the time of writing that is BlurXTerminator.2.pb
- Blur XTerminator is now ready to use!
How to Use
So, now you’ve installed Blur XTerminator, it will be very tempting to go back to old saved images and just run Blur XTerminator on them. Well unfortunately, that’s now how the tool is designed to work and this will limit its effectiveness.
Blur XTerminator is designed to be used early on in your image processing workflow, and while your image is still in a linear state. That is to say, before you do any stretching, and definitely before any noise reduction. So by all means, try it on fully processed images, but for full effectiveness, you will want to start from scratch and process your images again before doing a comparison.
Tip: Why not edit your images side by side, one using Blur XTerminator, and one not. That way you’ll see the clear difference and know they were processed exactly the same.
When you open Blur XTerminator for the first time, some default settings will already be applied. As you’d expect, these will perform perfectly well in most cases, so why not use these settings as a starting point and see how your image looks.
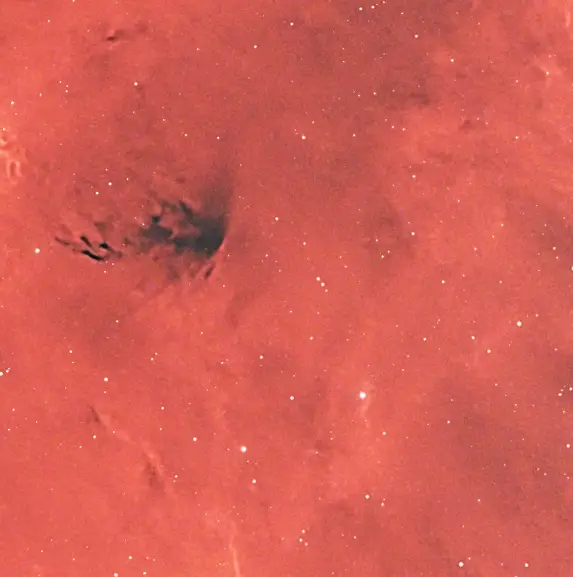
Important note: In order to see the full effect of Blur XTerminator, you will need to zoom in to your image. If you’re zoomed out, you probably won’t quite see the impact of what’s happening when you run the tool. See my example image below for a difference.
I recommend opening a preview window by selecting the circle in the bottom left corner of Blur XTerminator. It may take a moment for the preview to update based on the options you’ve selected in the tool. The preview tool is great because it allows you the chance to play around with the sliders and check boxes before applying the settings to your image.
Once you’re happy with your selection, all you need to do is drag the triangle in the bottom left over to your image, this will apply the Blur XTerminator settings to your image. On my laptop, it takes about 1 minute to run, your machine may be quicker or slower.
If you’re new to PixInsight and aren’t sure how to use it, then I have a handy guide for beginners for FREE here. It also includes free data of the North America nebula for you to use!
Example images

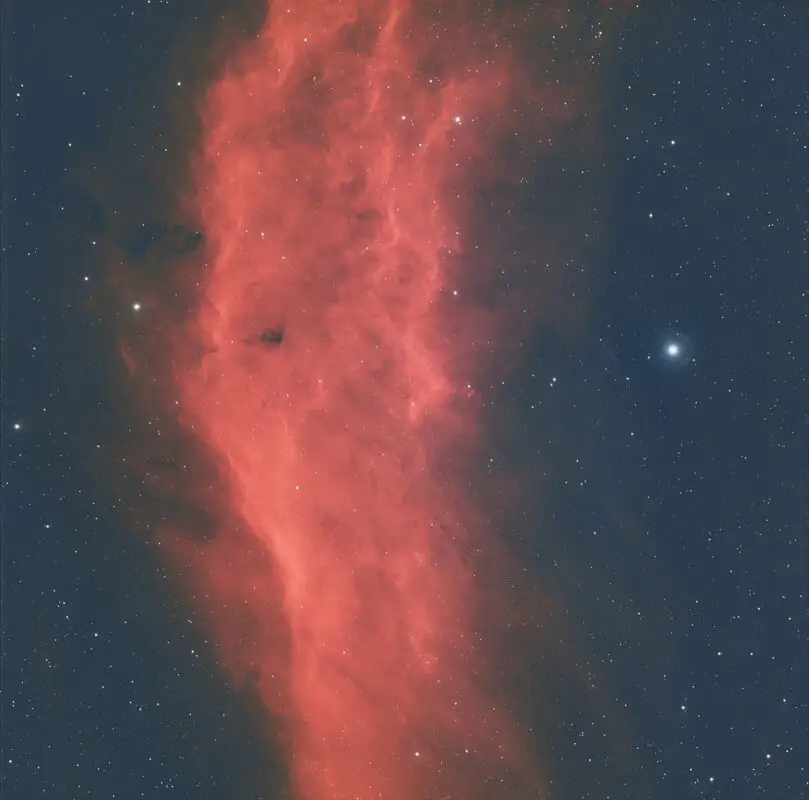
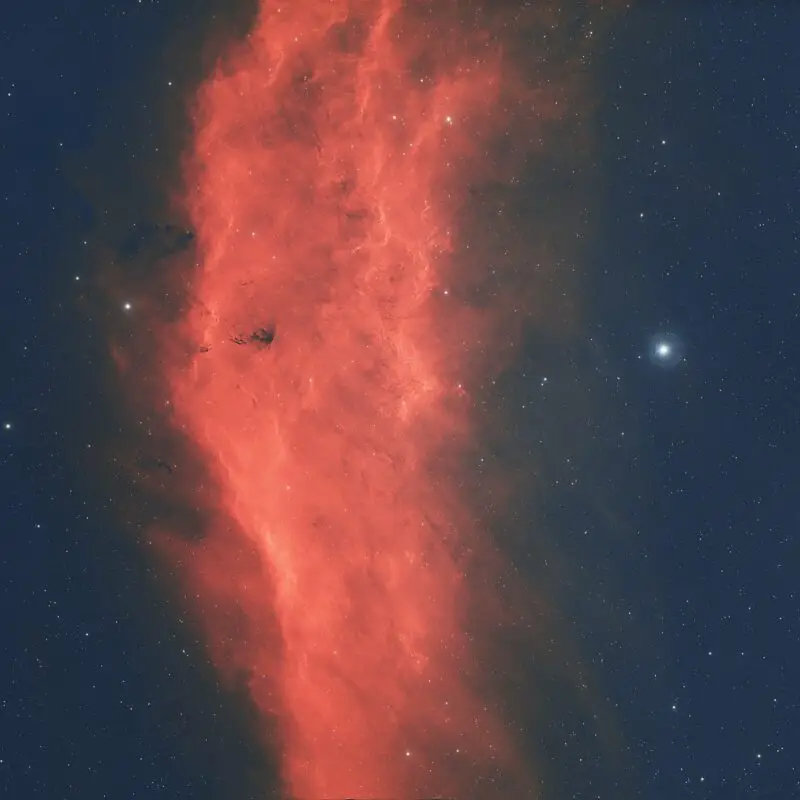
As you can see, Blur XTerminator can make a huge difference to the quality of your final image. These are 2 images that I edited side by side, the only difference is I applied a bit of extra saturation to the Blur XTerminator image as I preferred that colour in my final edit. Other than that, these 2 images have been processed in exactly the same way.
You can also see that Blur XTerminator has elimated some of the stars, I quite liked the look of it this way but if you want to preserve more stars then you can adjust the slider according to your preference.
Summary
It doesn’t matter if you’re an experienced PixInsight user, or a complete beginner, Blur XTerminator is a game changer for your astrophotography images. As you can see from my example images, the nebula is brought into sharper focus and pulls out more nebulosity, particularly around the darker structures of the nebula. This creates more contrast, which makes the image look much more detailed than before.
The only question is, how many images do you have in your back catalogue that you want to apply this to?!