Thanks to advances in camera technology, it’s now possible to take incredible astrophotography images with just your smartphone! However, that doesn’t mean that it is as simple as “point and click”, there is a lot of skill involved in taking astrophotography images.
This post will give you some tips so that you can take the best astrophotography images possible with your smartphone.
Buy a Tripod
Stability is key to any form of astrophotography. You’ll need to buy a sturdy tripod to hold your phone still long enough to capture a dark sky. Since we’re only using a smartphone, you don’t need to spend a lot of money to buy a tripod. There are plenty of options available on Amazon, but one I would recommend is the…
If you’re connecting your phone to the eyepiece of a telescope, then you’ll really benefit from buying a phone adapter to hold your phone still to capture the beauty of a celestial object such as the Moon. You can buy…
Get to Darker Skies
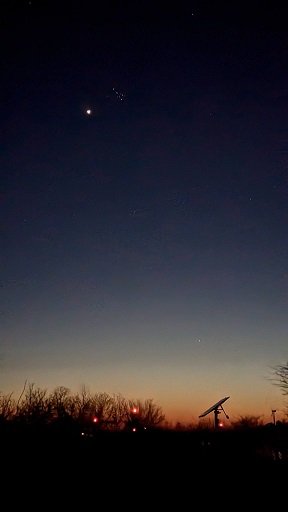
It might seem obvious to say, but the quality of your images will vastly improve the further away you are from light pollution. You don’t have to drive to the middle of nowhere and stand in a field to benefit from darker skies – it’s all relative. If you live in the middle of a city, then driving 5 minutes out of town will still provide better quality images.
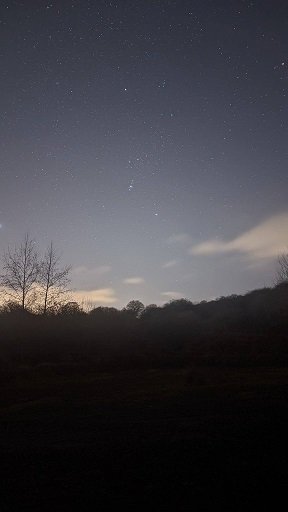
If you’re wanting to capture Milky Way images, then darker skies are absolutely essential. The darker the better but a minimum of bortle 4 skies is needed, otherwise your images will be too difficult to process due to light pollution.
Be Aware of the Moon
While we’re talking of light pollution, the Moon can be the biggest polluter of them all! You can travel to darker skies, but if the Moon is full, you’re not capturing any Milky Way images that evening. Of course, if it’s the Moon that you’re wanting to image then great!
The Moon is so bright that it can wash out most of the sky when full. This makes astrophotography incredibly difficult. I would recommend only imaging the Moon when the Moon is up, because without more specialist astrophotography equipment, your images will be too washed out to do anything else.

Shoot in the RAW Format
Most smartphones these days take their images in the HEIC format by default. While this is better than a JPEG, this isn’t good for astrophotography as HEIC is a compressed and processed file format, which will create issues later on when producing your final image.
By shooting in RAW, you have full control over the settings, and will have the uncompressed, unprocessed versions of your image files. Meaning that post-processing will be much easier, resulting in a better final image.
To be able to shoot in RAW, you’ll need to download a third-party app. There are lots of options both free and paid on Android and iOS. For iOS I like to use ProCamera, it even lets you use your Apple Watch as a remote shutter to prevent camera wobble!
Change the Camera Settings
Linked to the tip above. The default settings of your smartphone camera aren’t going to be the best for astrophotography, even if you have a phone that has a “night mode”. This is where your third-party app really comes into its own.
Being able to take full control of your ISO and shutter speed settings is not something smartphone camera users are necessarily used to. Unless you’re already using an app like ProCamera or own a DSLR/mirrorless camera.
However, taking full control over your camera settings is essential for the best astrophotography image. Being able to make small adjustments can make a big difference, and without a third-party app you’re really going to be limited with what you can do.
Plan your Imaging Session
This is another category where an app can help you immensely. If you’re imaging the Milky Way, image composition can be everything. Having something in the foreground of interest can really make the image standout. It’s hard to know how your images will look, even if you have a location in mind.
PhotoPills is an app that helps with exactly that. Let’s say you’re wanting to line up the Moon with a local landmark but aren’t sure if it’ll rise in the right position. Well, PhotoPills can help you plan for that by telling you exactly when the Moon will line up with that landmark.
It’s also no good trying to photograph the Orion constellation in July, as that’s a winter constellation. Knowing what you’re able to image and when is a big part of your imaging session, and planning your image before taking it will save a lot of time and frustration, but also mean you’re one step ahead every time you head out to image.
Experiment
Aren’t sure if something is going to work? Try it. Use different settings, try that shot that seems impossible to get right. The best photographers, the ones I look up to most, are the ones that try something that nobody else is doing. It makes them unique and standout against the rest.
Anybody can take an image of the Moon with their phone through the eyepiece of a telescope. However, not everybody can take an image of the Moon rising above Stonehenge and get the composition just right.
Experimenting is what will make you different to everyone else. Just try it, the worst that will happen is you end up with a poor image that you never share, but you’ll have learned a lot along the way.
Take Multiple Images
As we’re taking images in low light, there will be a higher level of noise than in a daytime image. That’s why taking multiple images is so important, as we can increase the signal-to-noise ratio of our images by stacking them together to create one merged image.
This is another reason why using the RAW format is so important, as stacking software such as Sequator can read those files and stack them together. Even if you’ve taken a Milky Way image with a static foreground, Sequator can make allowances for that by stacking just the sky portion of your image to counteract the Earth’s rotation.
Multiple images will improve your signal-to-noise ratio, meaning that when stacked together, your image will be much cleaner, allowing you to create a much better final image.
Use Software to Edit your Images
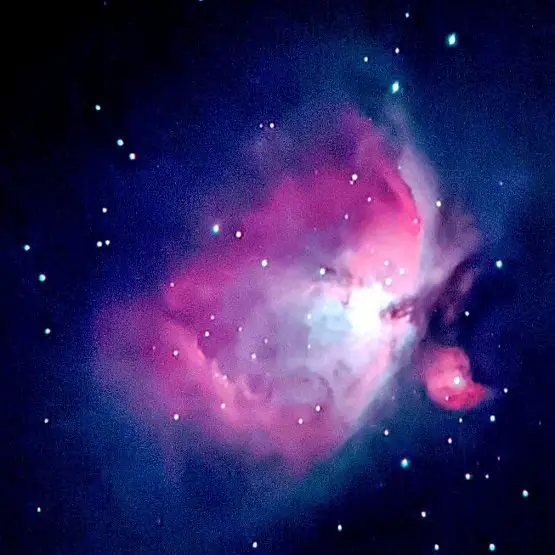
To really pull out those finer details in a night sky image, we need to edit them using software such as Adobe Lightroom or Photoshop. This isn’t cheating, the detail is there in the image, we just need to make some adjustments to pull it out more.
Often when looking at a stacked night sky image, there isn’t too much to look at. All those incredible astrophotography shots you see on Instagram have been processed using software. This step really is the difference between having an image where you have to squint to see the Milky Way, to the WOW moment that you have when you see a Milky Way image in detail.
