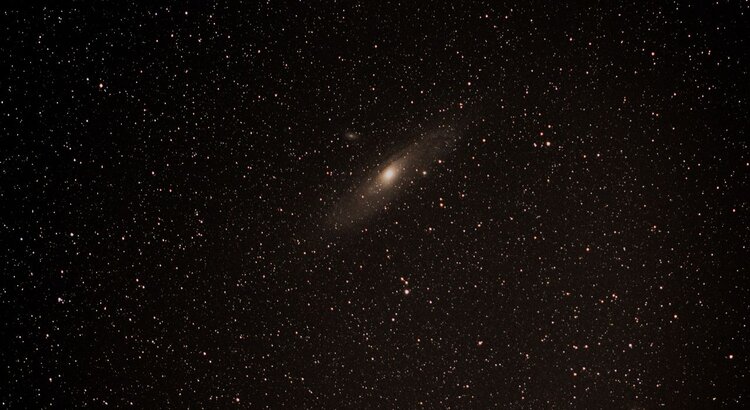
The Andromeda Galaxy was my first ever DSO target, which I shot with my unmodified Canon 1300D DSLR & 70-300mm lens.
I had been struggling along with a cheap telephoto lens with my unmodified DSLR mounted on the Sky-Watcher Star Adventurer – a piece of kit I whole heartedly recommend. I was achieving mixed results, mostly while I got to grips with polar alignment but the camera lens was my real limitation – oh and the lack of a dew strap!
I took this image of M31, which consisted of 50x 2-minute exposures with 20 dark frames.

I was really proud of this image as the learning curve I had undertaken to achieve this result was massive. I had to learn how to polar align, how to use a DSLR for astrophotography, how to focus, star hopping, calibration frames, stacking and processing all to achieve the result you see above.
Clearly the image isn’t going to win any awards for the best M31 image ever taken, but it was so significant to me. Being able to produce that image meant I was finally doing something right and that my limitation was now my equipment (mainly the optics) rather than my ability.
It’s very easy in this hobby to spend a few thousand pounds on expensive, complex equipment and achieve no results. You need to understand the process that is required to take deep sky images, understand your location in relation to your target, understand why polar alignment is important among lots of other things. You can’t just aim the telescope at the sky and take a long exposure.
This first image will forever remain one of my favourite images because of what it signifies. At that moment, however, I was hooked. I needed to take more images, but to do that I needed better equipment. I spent 2019 researching and buying equipment that would allow me to take the next step into some serious deep sky imaging.
Over the year I purchased a second-hand Sky-Watcher HEQ5 Pro mount, Sky-Watcher Evostar 72ED DS-Pro with Field Flattener/Reducer and M48 adapter so I could connect my DSLR. I then bought some accessories such as a dew controller, dew strap along with a couple of cables so that I could power this equipment from my 17Ah jump starter.
A few of these things were Christmas presents, it was a long 12 months waiting for all this equipment to be available to me. The Sky Gods were kind to me on Christmas Day and graced me with 3 hours of clear skies that very evening.
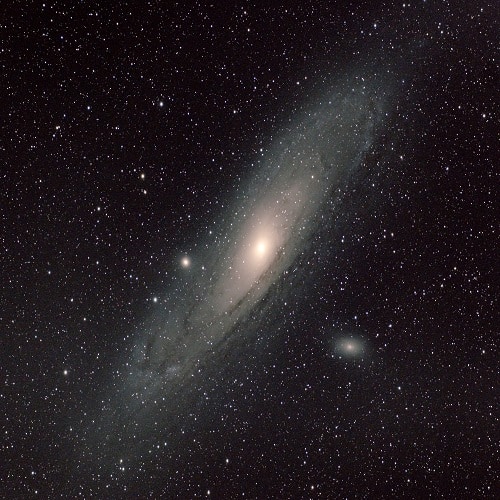
I had considered choosing a different target, but I wanted to see what difference my new equipment would make to Andromeda. So after trying and testing my new equipment during the day, I went outside and took the image below. This image was 55x 2-minute exposures with 25 darks, 30 flats and 50 bias frames.

Wow. What a difference! Don’t get me wrong, there are images of Andromeda out there that are much better than mine, but this was my image and I loved it. All the hard work I’d been putting in to research and learning this hobby had finally paid off and I couldn’t be happier!
I’m not embarrassed to say I felt a bit emotional after I hit save in Photoshop. This image even earned a spot in the March edition of the BBC Sky at Night magazine!
My next step is to carry on learning (it never stops) about my equipment and image processing and keep going back to M31 periodically to see how far I’ve come. There will be more equipment down the line no doubt (auto-guiding) but for now I want to make the best images that I can while trying to fully understand the equipment I already have.
If you’re just starting this hobby I hope this post shows what a little hard work and dedication can do in a relatively small time-frame and that when people recommend kit that is expensive (looking at you HEQ5!) it’s because it is so worth it. I fear that many people can be pushed away from this hobby due to frustration but it’s definitely a marathon and not a sprint when it comes to astrophotography. Oh and never underestimate the power of dew!
Checkout how I captured our galactic neighbour in my YouTube video below!
