Locating deep sky objects in astrophotography without a goto mount can be tricky, especially for beginners. I suffered many nights in my early days of trying to figure out where exactly in the sky I needed to point my imaging gear, only to get frustrated and waste the whole night without finding anything. If that sounds familiar to you, then this guide is for you!
In this post I’m going to break down 3 different ways you can locate deep sky objects, which will enable you to get more imaging time. Since I own the Skywatcher Star Adventurer Pro, I will focus on this mount, but these methods will work no matter what mount you are using.
Using a Telephoto Lens
If you’re using a camera lens, chances are you’ll be using something like a 300mm focal length, to ensure your deep sky object is framed up nicely in your field of view. Trying to locate an object at 300mm can be tricky if you’re a beginner learning the sky.
That’s why I would recommend using a telephoto lens and using it at the minimum zoom to begin with. Start by locating a bright star near to your target. For example if we were imaging the Veil Nebula, we would want to locate the bright star Sadr.
First locate this either by using Stellarium to see it’s position, or a star finder app on your phone, or by your own experience of knowing its location, and centre it in the frame of your camera. You can do this using the viewfinder but you will find it much easier to use your camera’s live view. Tip: Up your ISO to a minimum of ISO800 so that you can see the stars.
Once you have located the star within your field of view, take a long exposure test shot to see if you can identify your deep sky target within the field of view. If you can, great! Adjust your camera to centre your target in the frame and away you go! If not, no problem, read on.
You now need to figure out exactly what adjustments you need to make to find your target based on where you’re currently pointing. To do that, we can bring up our star finder app using our smart phone and take a look.
From here, we’re going to make small and incremental adjustments to our position until we find our target. Since in this example, we know that we’re using Sadr as our guide star, we can locate that on our app and see what adjustments need to be made.
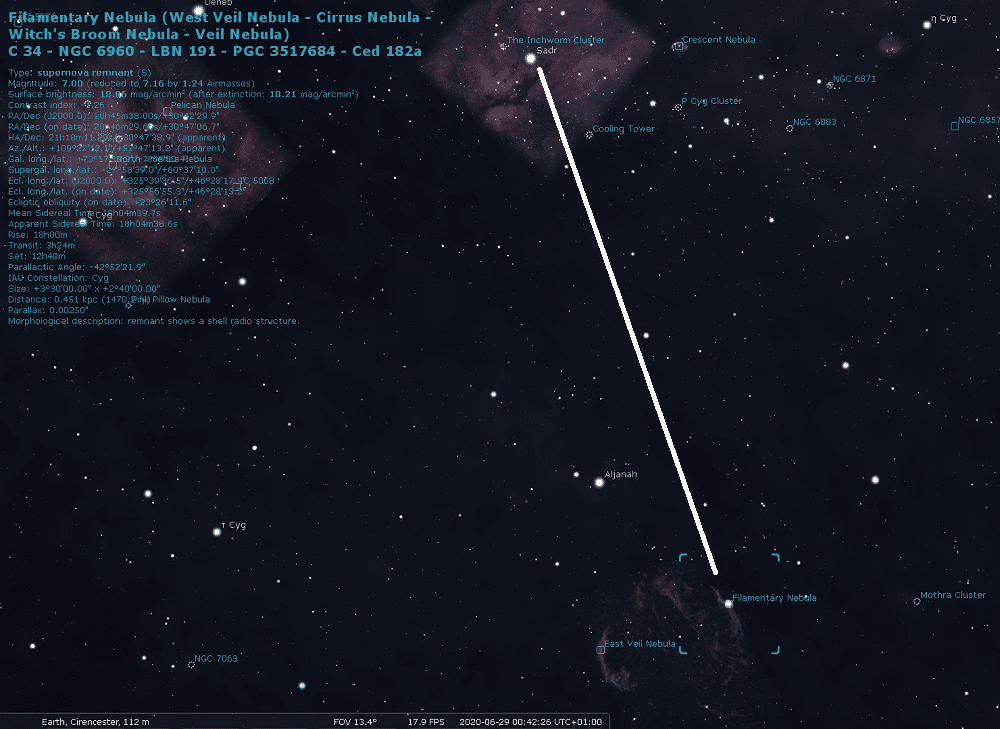
If we consider this screenshot to be a compass, then in order to find the Veil Nebula from Sadr, we need to move South South East. This is where working at a much shorter focal length will help us so that we will be working with a much larger portion of the sky. Below is a screenshot of Stellarium showing the FOV of my Skywatcher Evostar 72ED and Canon DSLR.
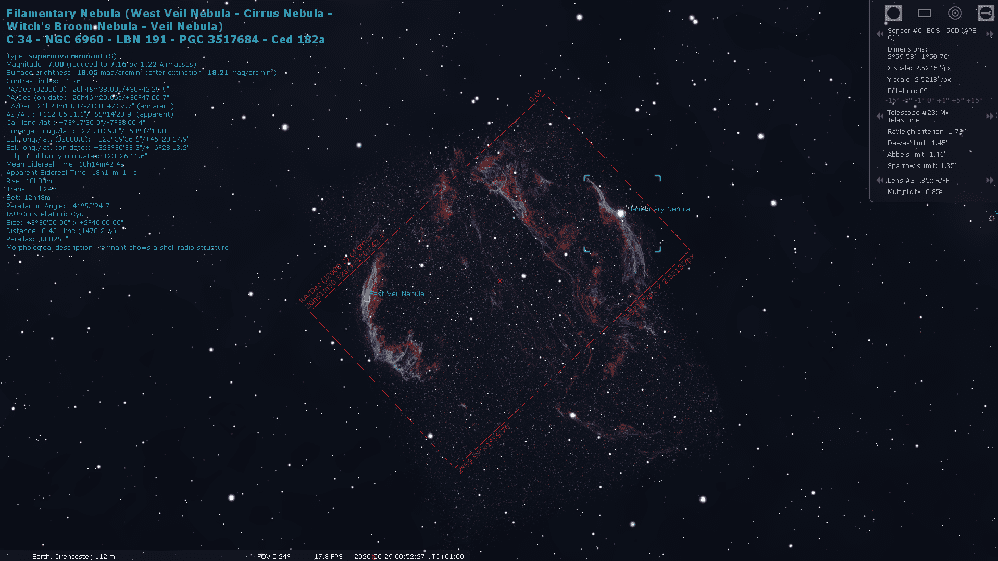
As you can see, the red dotted line is the FOV of my imaging equipment. Oriented the correct way, you can fit the East and West Veil nebula in this FOV. However, you can’t see any other portion of the sky. If we compare that to using a camera lens at 135mm:
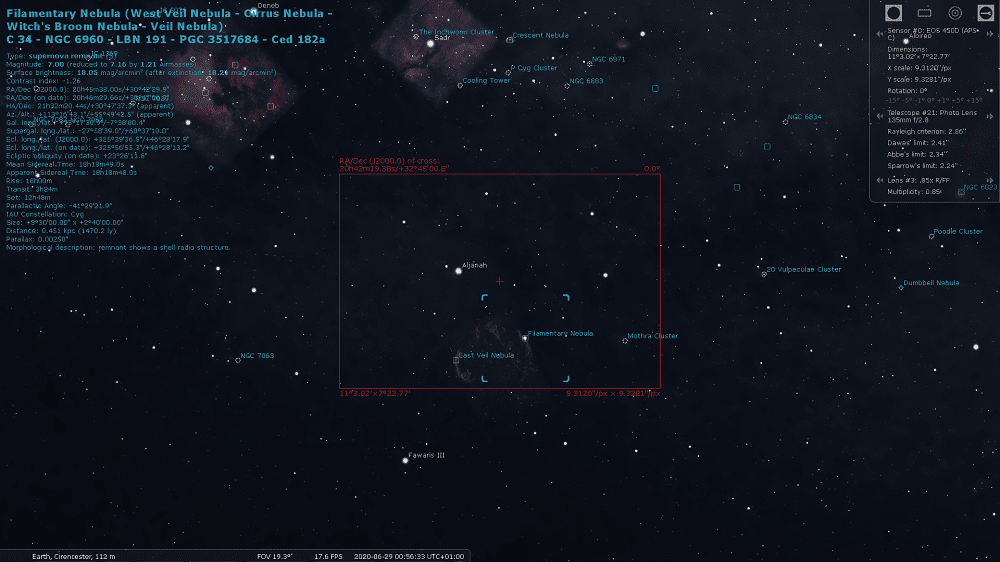
In this FOV, at 135mm we have a much larger portion of the sky to work with. The distance from Sadr to the Veil nebula is much easier to figure out.
In this scenario, I would ensure Sadr is in the centre of my frame and then move it until it is right at the bottom of my FOV in the live screen on my camera. From there, I would move my camera down until Sadr is at the top of my screen, and then move that same distance down again. You should now be looking at a very similar FOV to the one above.
Now let’s take another long exposure to see the FOV again. You should be able to identify the bright star 52 Cyg, which is the bright star at the centre of the Western Veil Nebula. It will be easy to distinguish this star between others because of how big and bright it will appear on the screen.
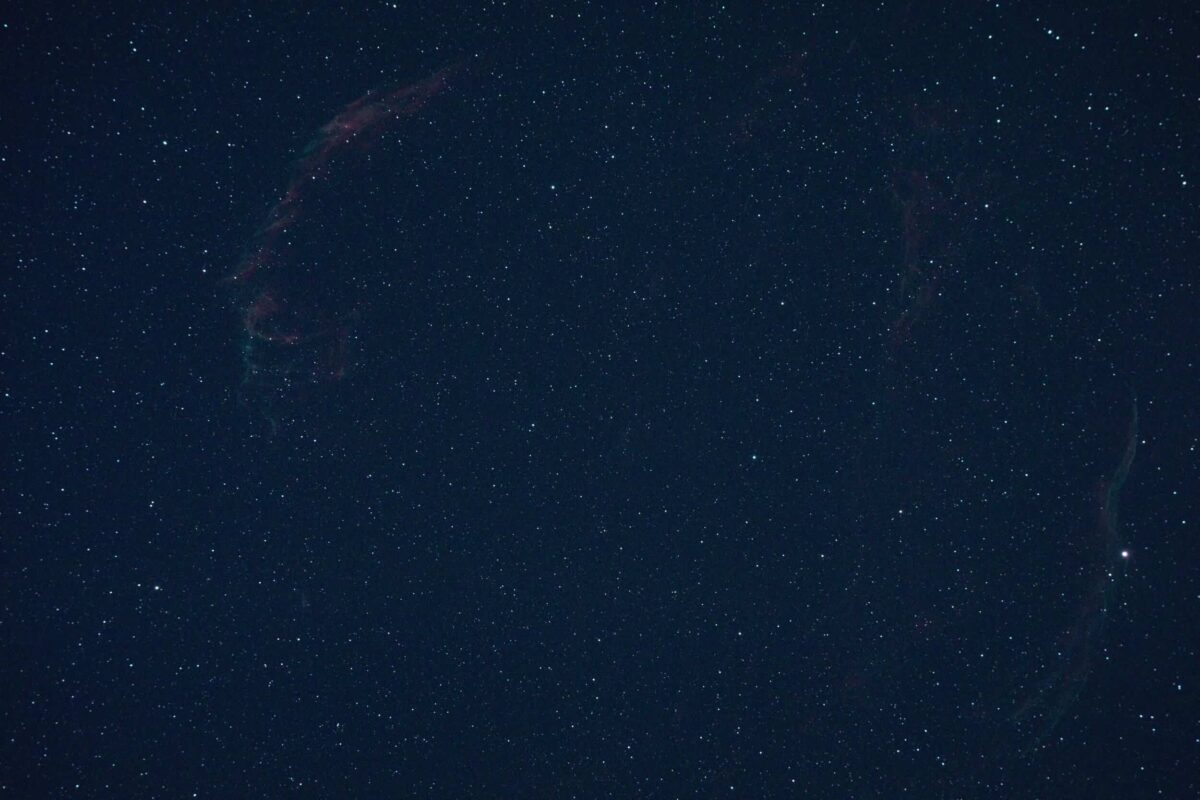
Above is a 2 minute exposure of the Veil Nebula using my Skywatcher Evostar 72ED and DSLR. You can see in this image there is a star that is considerably brighter than any other, that’s 52 Cyg. If you look closely you can see the outline of the Western Veil nebula. Further over to the left you can make out some colour in the Eastern Veil nebula This is to give you an example of what it will look like, albeit at a different focal length.
All we need to do now is find 52 Cyg on the live view of our camera, and keep zooming in to our desired focal length, ensuring that we centre on 52 Cyg, unless you want to image the East and West Veil together (it will fit at this focal length), then ensure you keep 52 Cyg towards the edge of the FOV.
Using a Prime lens
The above will work very well for a telephoto lens, but what if I’m using a prime lens? I hear you ask. Well if you’re using a prime lens then I would recommend swapping lenses, it’s a little more tricky but the principles are still the same:
For this example, let’s assume you’re using a 300mm prime lens.
- Change your prime lens to a smaller lens, either prime or telephoto but preferably telephoto.
- Locate Sadr (or a bright star near to your chosen target if different)
- Take a test shot
- Centre Sadr
- Using camera live view, move the camera down so that Sadr starts moving up on the live view
- Take another test shot and identify the star 52 Cyg
- Centre on 52 Cyg
- Zoom in again, re-centering if needed
- Repeat until you’re at the full zoom of that lens before finally swapping to your imaging lens
Plate Solving
For those unfamiliar, Plate Solving is an analysis tool that can use your test shots and locate where your telescope is pointed. With a GOTO mount, the Plate Solving software would then send the mount to the correct location for the target you want to image. Since we’re not using a GOTO mount, we will have to make these adjustments manually, but it can still be incredibly useful if you’re unsure what part of the sky you’re pointing at.
This option is more advanced than our previous 2 options, and does require the use of a laptop so it may not be as useful if you’re out in the field with your equipment but I include it as it takes the guess work out of it.
In this example I will be using Astrophotography Tool (APT) as my image capturing software and AstroTortilla as the Plate Solving software, but feel free to use different software if that’s what you’re used to. Load up APT and connect to your camera by clicking the Connect button on the camera tab.
APT and AstroTortilla will talk to each other during this process, APT will control the camera, and send the image capture data to AstroTortilla to look up the image in its database to identify where we’re pointing in the sky. But before that happens, we need to setup that connection between APT and AstroTortilla. In the camera section of AstroTortilla, select AstroPhotography Tool from the dropdown box.
Now that we have connection between the software, we can capture our first image to plate solve. Take a quick image (5-10 seconds) by setting the exposure time in AstroTortilla and then press the Capture and Solve button. AstroTortilla will now look up the image in its database and tell you exactly where you’re pointed in the sky by using the stars in the field of view. From here, you can then make minor adjustments based on your location until you reach your target.
The power in this method is that you will always know where you’re pointing in the sky, it completely takes the guess work out of it! You will easily find your targets using this method, but it is the most advanced and involved method for finding deep sky objects with a star tracker.